Table of Contents
Class Prep
Class 1
Class 2
Class 3
Class 4
Class 5
Class 6
Class 7
Class 8
Class 9
Class 10
>>Topical Articles<<
Assumed Longitude
Bowditch
Bygrave
Casio fx-260 Solar II
Emergency Navigation
Making a Kamal
Noon Sight
Pub. 249 Vol. 1
Sextant Adjustment
Sextant Skills
Sight Averaging
Sight Planning,
Error Ellipses,
& Cocked Hats
Slide Rules
Standard Terminology
Star Chart
The Raft Book
Time
Worksheet Logic
BCOSA.ca
Making a Kamal

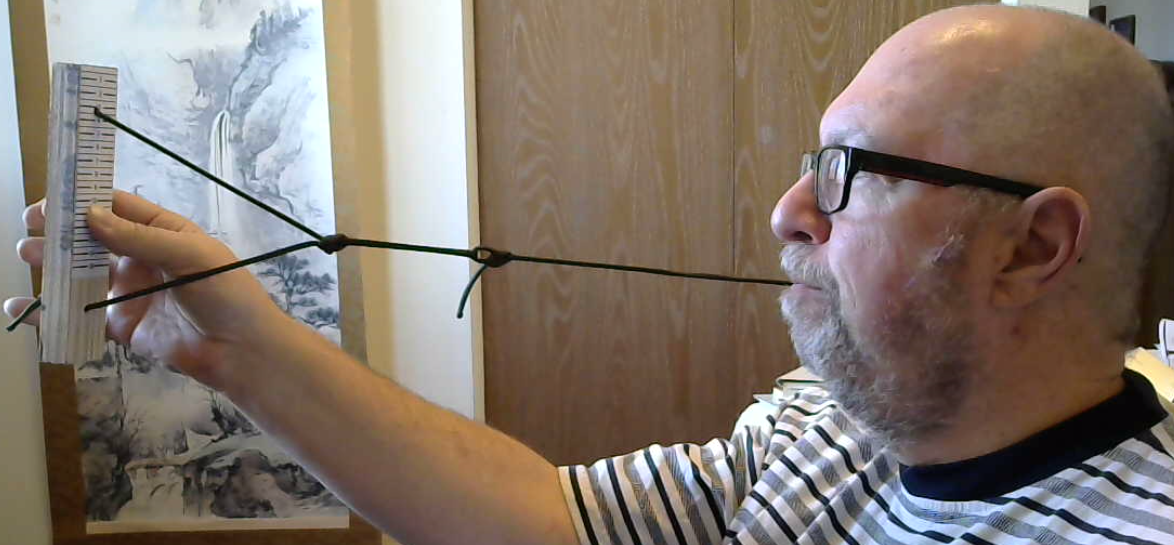
A kamal is an Arab navigation device from the 9th century -- basically a stick with markings on it attached to a string with a knot in the end. You hold the knot in your teeth, and then place the top edge of the kamal on the center of your celestial object. If you have a ruler you can use, great. A retractable tape measure will also serve you.
If your celestial object is the sun, put the top edge of your kamal directly over the top of the sun so you don't damage your eye, and then subtract 1/4° to compensate for sighting the top edge. The sun's diameter is 32'. So its radius is 16', or pretty close to the 1/4° figure we will use for the kamal.
If you are shooting the moon, you can sight for the moon's top (or bottom) edge, then you can subtract (or add) 1/4° to its altitude. The moon has a radius of 1/4°, just like the sun. (This is, by the way, why a "total eclipse" can be total. Both the moon and the sun have the same diameter as seen from the earth.)
Put your thumb down even with the horizon...and then read the altitude of your celestial object.
In my first try using this particular kamal, I got an altitude of 10 1/4° for the object I sighted, or 10° 15'. My Tamaya sextant gave me an altitude of 10° 03'. So I was within 15'.
If you want to use equidistant marks on your kamal, you can only go up to 15°. Beyond that, the spacing between the lines will vary, and you must use trigonometry to calculate the intervals. (See below.)
With this sort of small kamal, you will be focusing in mostly on planet/star shots during twightlight before dawn and after sunset, and the moon whenever you can get it. You will be selecting your objects that are no more than 15° above the horizon. But if suitable objects are available in your location, at your time of year, you can get reasonably accurate fixes.
Tonight in Edmonton, during nautical twilight, the following objects are available at altitudes of 15° or less.
Object Altitude
Antares 6° 54'
Capella 10° 16'
Moon 11° 15'
Jupiter 12° 20'
Saturn 13° 54'
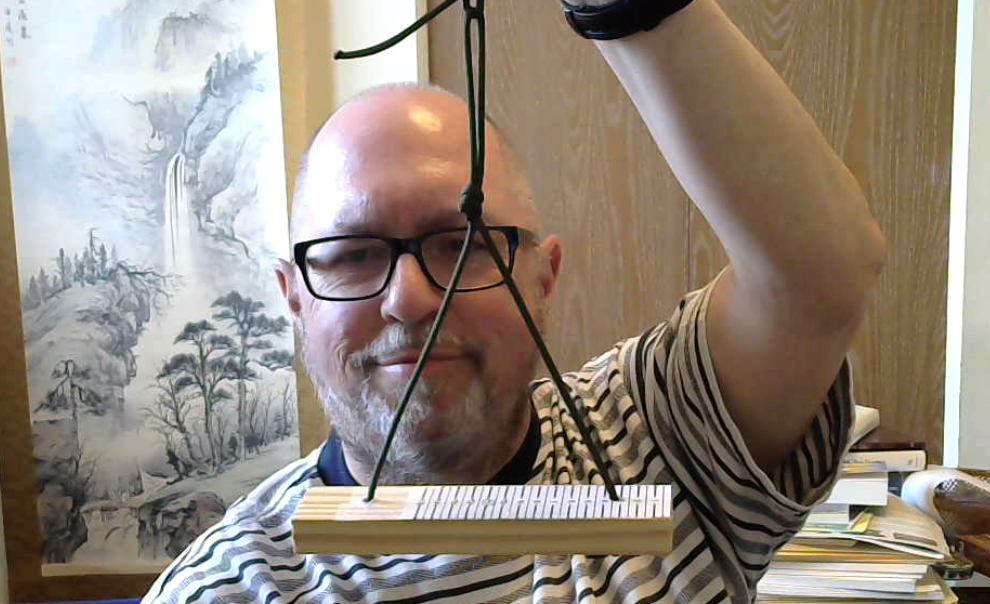
You can make a kamal just like mine, with a comfortable string length of 18.0" (45.8 cm), by downloading this graphic and taping it to a short length of 1x2 lumber. I attached the strings in such a way to make my kamal hang horizontally when suspended, which means that it will be easier to keep it vertical when using it.
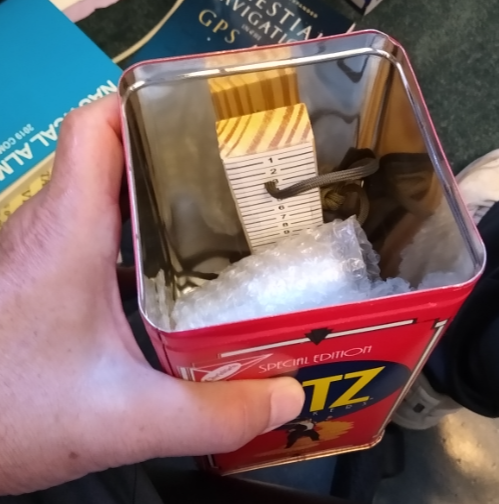
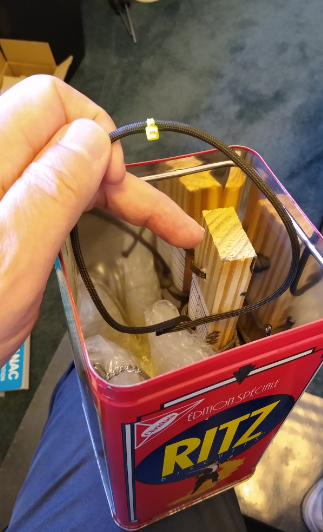
This kamal is small enough to fit in my Ritz Crackers tin Faraday cage emergency kit. Made of wood, it needs no protection from EMP, of course...but it is a convenient place
to stash a small piece of emergency navigation equipment.
Improvising a Kamal at Sea
You have just dropped your sextant overboard. "Next time," you say, "I will put that lanyard around my neck." You look for something straight that you can conveniently hold, and mark with lengths. You want to be able to sight the sun, so you want your "something straight" to be opaque so you don't blind yourself. Your clear plastic parallel rules are out. You don't have a "stick" on board, and you don't have a string, and you may not even have a ruler.
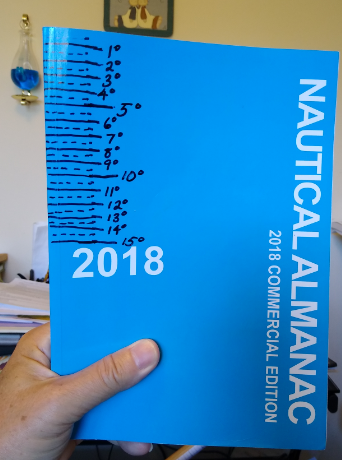
No matter. You can even use the edge of a book, like your Nautical Almanac. Hold it out in front of you with one or both hands. Calibrate it by looking at the night sky. The distance between Merak and Megrez in the Big Dipper is 10.0 degrees. Hold your improvised kamal up and put the top of edge on one of those stars, and your thumb on the kamal opposite the other. Then mark that distance off as 10°. Subtract half that length to mark 5° and add that same amount to get 15°.
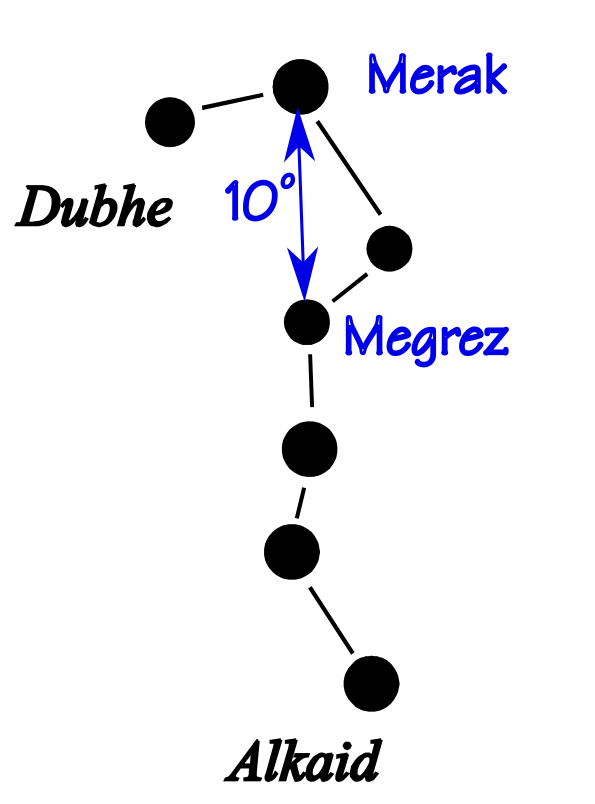
A second measure you can use is to look at Castor and Pollux, with a separation of 4.5°.
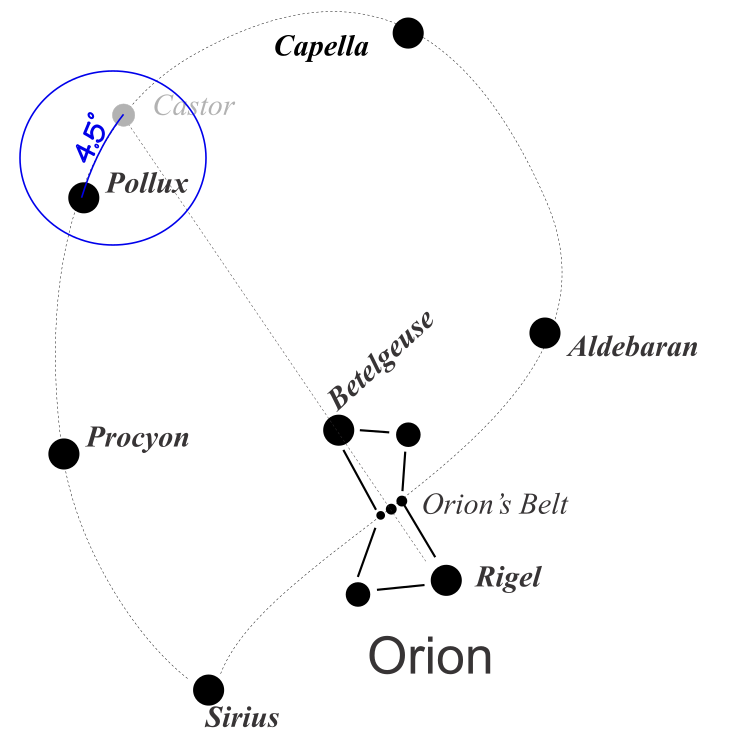
After you have 5, 10 and 15 degrees marked off...and you have 4.5° marked off, by observing the 0.5° difference between the 4.5° and 5° marks, you have the wherewithall to finish marking increments on your improvised kamal.
I see that in this picture, my old style "weather glass" barometer (as in "the glass is falling. We are in for a real storm now!") has a vertical arc distance of 4° from my eye, as I sit in my office chair.
You will want to use the dip and main correction for sights, just as you would with your sextant. Index error, of course, is irrelevant.
Improvising a Kamal from a Boathook
As I was thinking about The Raft Book by Gatty, I saw a scale at the bottom of his chart #1...from which I inferred that Gatty was telling people they could make a Kamal to cover a much broader range of celestial altitudes.

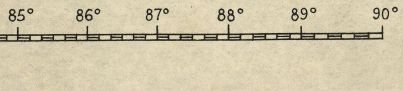
I observed that the width of a degree was not the same throughout the length of the scale. From this, I further inferred that I could build a spreadsheet in Excel to calculate the intervales between my lines.
If you wish, you can download the Excel spreadsheet here, and pick a string length for your kamal that is comfortable for your length of arm.
So then, if you stick a copy of the spreadsheet into your emergency kit (Faraday cage, in my case) and a Sharpie Marker, you can put marks for degrees on your boathook to allow you to use it as a kamal. The other thing you will need is a consistent string length. I solved this by cutting a piece of string precisely 455 mm long. I marked the string with a yellow cable tie...just so I didn't throw it away by mistake.
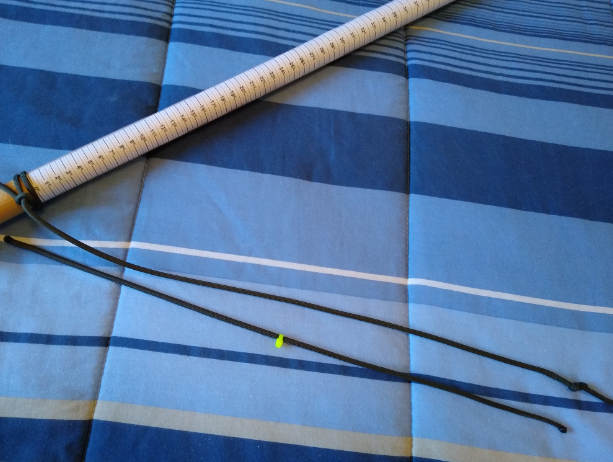
I then need a string that is a bit longer...455 mm plus enough for a round-turn-and-two-half-hitches on the shaft of the boathook. And then, to simulate a boathook, I went out and bought a broom handle. In this picture, you can see my 455 mm measuring-standard string (with the yellow), the longer string which has been attached to the broomhandle, with a knot at the 455 mm length. It doesn't matter how long this second string is. The key is that the knot you hold in your teeth is at the proper distance.
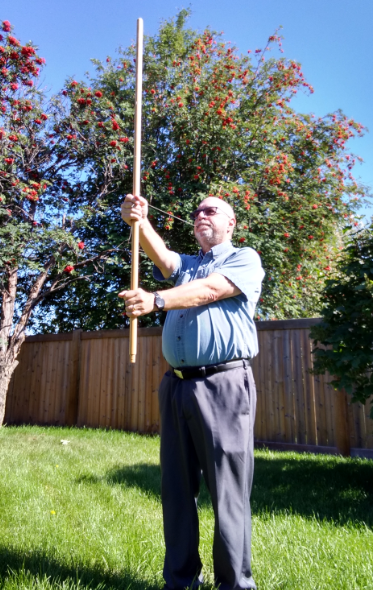
In using my "boathook" (i.e. broomstick), I used both hands to try and keep it vertical.
With the small, 15° kamal, I put 0° at the top. The idea is that I could just cover the sun with the kamal, which keeps my eyes from damage, and then align the bottom with the horizon. This being so, I would always be using the sun's upper limb in calculations.
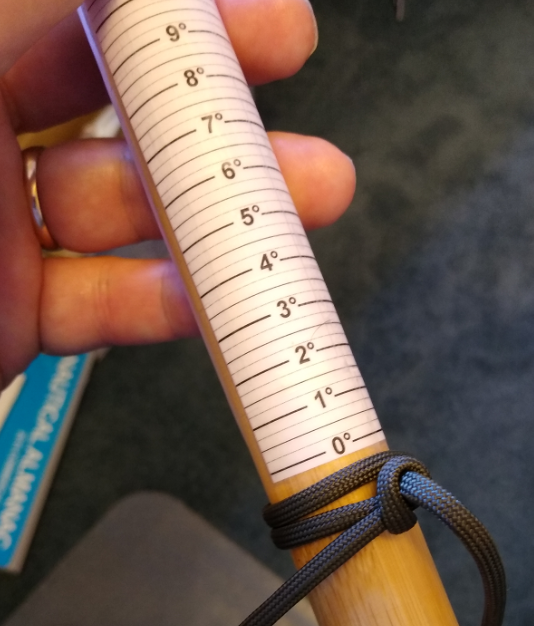
With this longer kamal, I put the 0° mark immediately above where I tied my string...with the degree marks going up the stick vertically.
Using the small kamal, I found that I got accuracy within 15' of what I got with my sextant. With the "boathood-kamal", I was out by roughly 35' when the sun was 38° high in the sky. So the accuracy decreases as the altitude increases.
By chance, I found that the width of my broom handle was the same as the diameter of the sun. So I could just barely see the edges of the sun to either side of the handle. This being so, I read the angle as being to the center of the sun rather than the upper or lower limb.
If you want to play around with a boathook-style kamal, and are happy to use the same string length as I did, then you can download this set of scales. Being a computer programmer by trade, I found it quicker to write a routine in VisualBasic to lay down lines with mathematical precision, than to try and meausre everything out with a ruler and a Sharpie marker by hand.
You can cut these scales out and tape them to a boathook (or like me, a broom handle). Here is a snapshot of a piece of that PDF file.
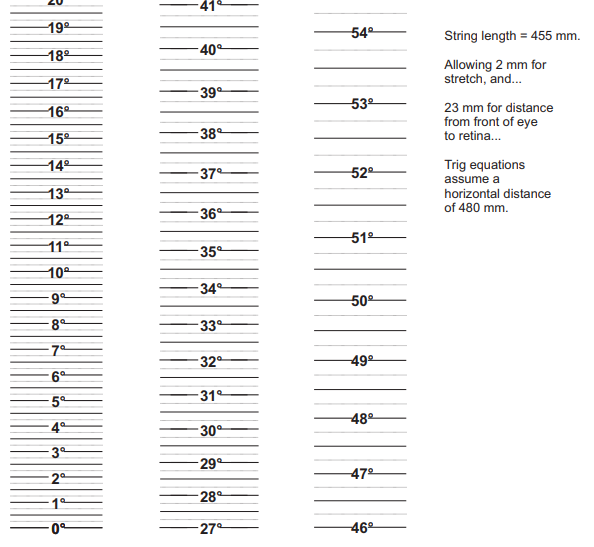
Actually, if I owned a boat, I might tape these scales to my boathook permanently and then protect the paper from water with clear packing tape. Then all I need to keep in my Faraday cage emergency kit is a string that is pre-cut to 455 mm, and a longer string that can be tied to the boathook when needed.
The Mathematical Fine Print
Read this section only if you are mathematically curious.
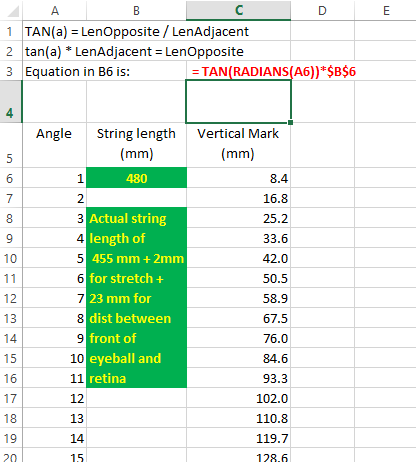
The trigonometry equation for solving the angle of one corner of a right triangle when you know the length of the adjacent side and the opposite side is:
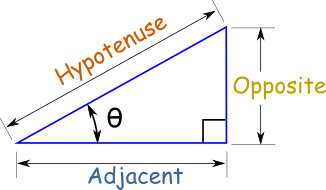
tan(θ) = LengthOpposite ÷ LengthAdjacent So then, if you want to have a vertical scale of centimeters (which with 1° = 1 cm is convenient to make) you can calculate the length of string you need with
LengthAdjacent = 1 cm ÷ tan(1°) ...which gives you a string length of 57.3 cm.
Using a string this long is just a little longer than I can comfortably manage with my arm length. So I went with:
LengthAdjacent = 0.8 cm ÷ tan(1°) ...which gave me a very nice string length of 45.8 cm, or 18.0 inches. I would never use such a string length if I were improvising a kamal from a ruler in an emergency. You would be unlikely to get accurate altitudes on the fly trying to use a conventional ruler at 0.8 cm per degree. But with a computer and printer available, I used the Inkscape vector drawing program to space my lines precisely 0.8 cm apart.
If your arm is long enough to manage a 57 cm string, then use that. Actually, if your arm is 57 cm long, you don't need to use a string at all. Just hold a ruler out. You will get acceptable accuracy at 1.0 cm per degree. However, if your arm is more like mine, you can download a PDF of my graphic with the 0.8 cm per degree by clicking here.
As indicated above, a kamal with fixed intervals between the degree marks is only useful for angles of 15° or less. This is because a kamal has a fixed string length. But you know from using a universal plotting sheet that as your angle increases, the base of your triangle needs to shorten up to keep your degree sizes consistent. But for low angles, you get acceptable accuracy with a single string length.